An Azure subscription - Create one for free.
Access granted to Azure OpenAI in the desired Azure subscription.
Currently, access to this service is granted only by application. You can apply for access to Azure OpenAI by completing the form at https://aka.ms/oai/access. Open an issue on this repo to contact us if you have an issue.
An Azure OpenAI Service resource with either the gpt-35-turbo or the gpt-41 models deployed. For more information about model deployment, see the resource deployment guide.
1 GPT-4 models are currently only available by request. To access these models, existing Azure OpenAI customers can apply for access by filling out this form
Navigate to Azure OpenAI Studio at https://oai.azure.com/ and sign-in with credentials that have access to your OpenAI resource. During or after the sign-in workflow, select the appropriate directory, Azure subscription, and Azure OpenAI resource.
From the Azure OpenAI Studio landing page, select Chat playground.
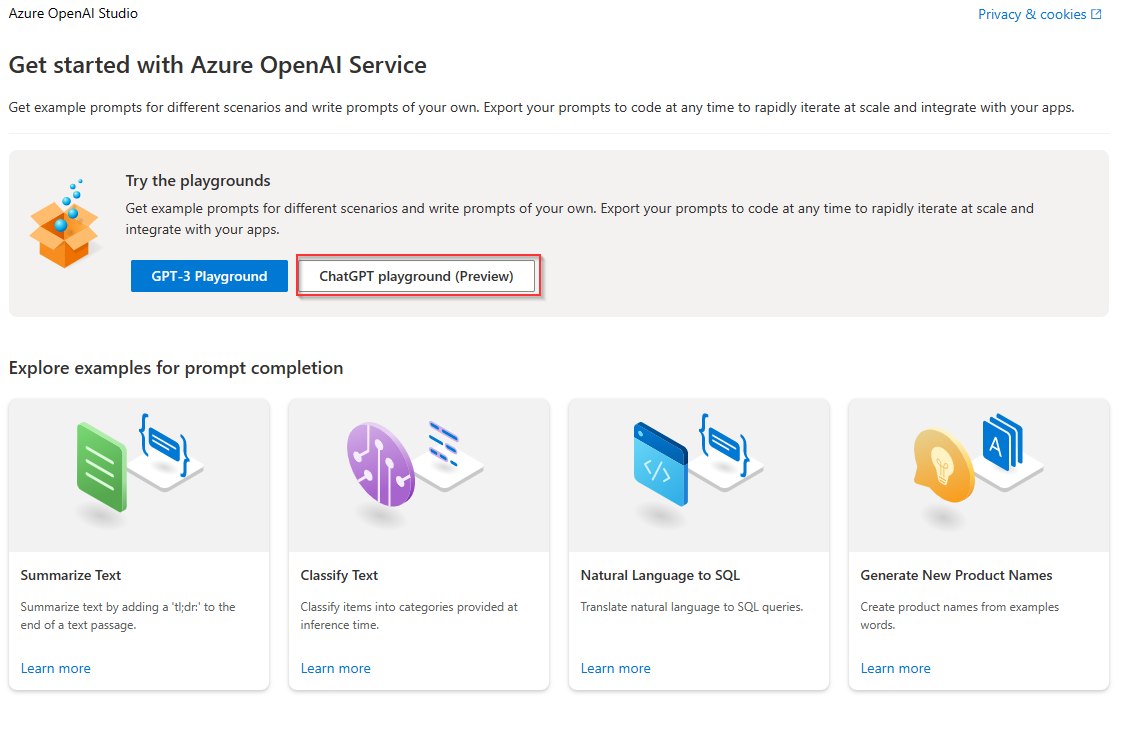
Start exploring OpenAI capabilities with a no-code approach through the Azure OpenAI Studio Chat playground. From this page, you can quickly iterate and experiment with the capabilities.
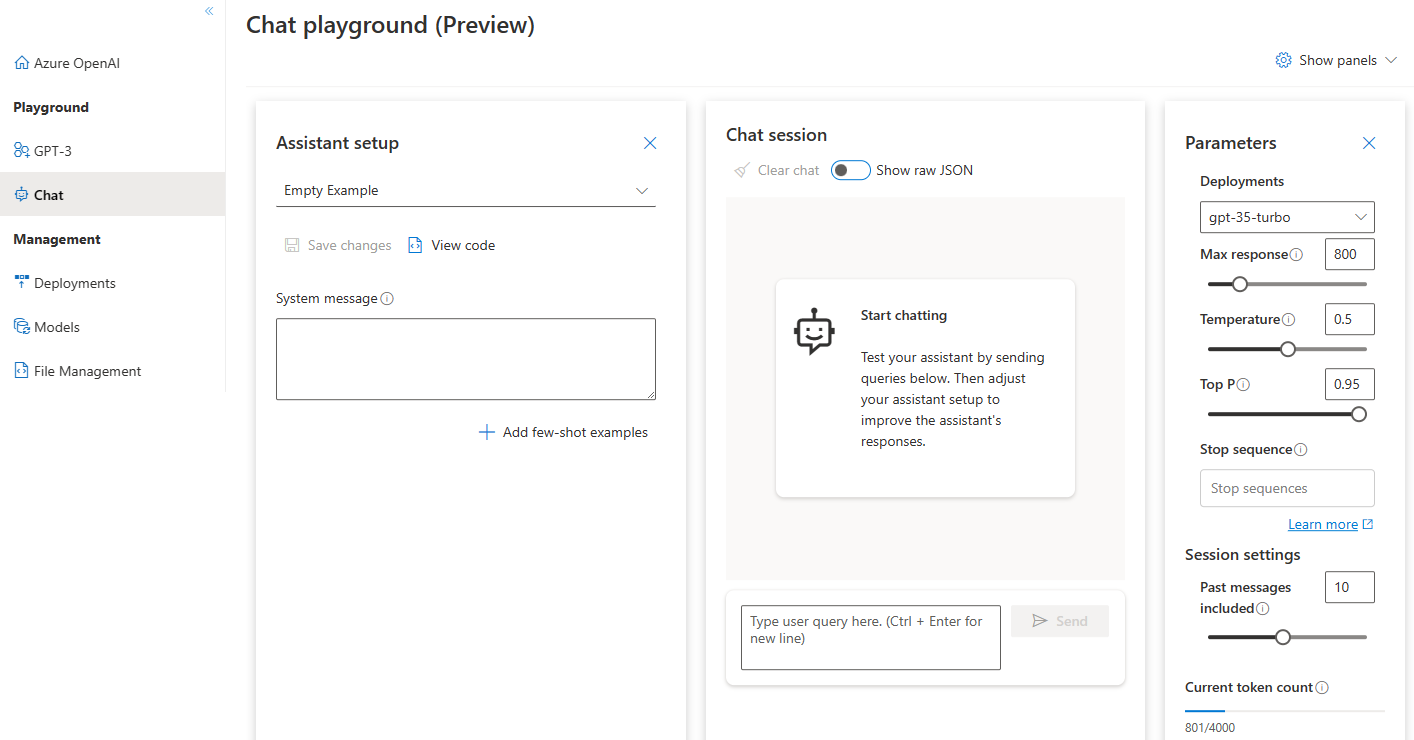
You can use the Assistant setup dropdown to select a few pre-loaded System message examples to get started.
System messages give the model instructions about how it should behave and any context it should reference when generating a response. You can describe the assistant's personality, tell it what it should and shouldn't answer, and tell it how to format responses.
Add few-shot examples allows you to provide conversational examples that are used by the model for in-context learning.
At any time while using the Chat playground you can select View code to see Python, curl, and json code samples pre-populated based on your current chat session and settings selections. You can then take this code and write an application to complete the same task you're currently performing with the playground.
Selecting the Send button sends the entered text to the completions API and the results are returned back to the text box.
Select the Clear chat button to delete the current conversation history.
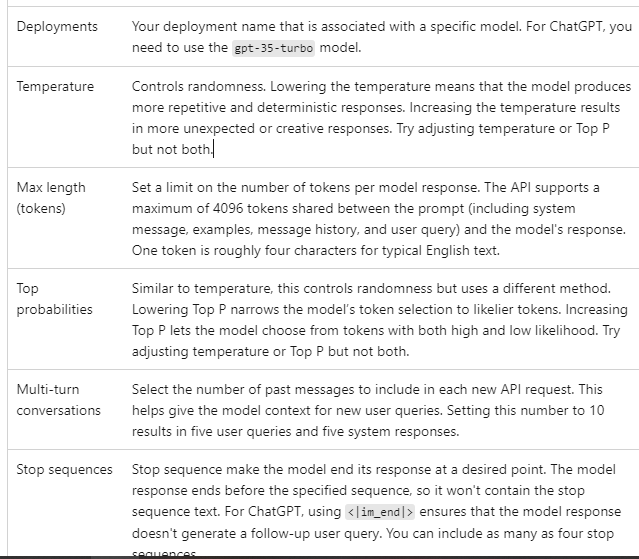
By default there are three panels: assistant setup, chat session, and settings. Show panels allows you to add, remove, and rearrange the panels. If you ever close a panel and need to get it back, use Show panels to restore the lost panel.
Start a chat session
From the assistant setup drop-down, select Xbox customer support agent
You'll be prompted asking if you want to update the system message, select Continue.
In the chat session pane, enter the following question: "I'm interested in buying a new Xbox", and select Send.
You'll receive a response similar to:
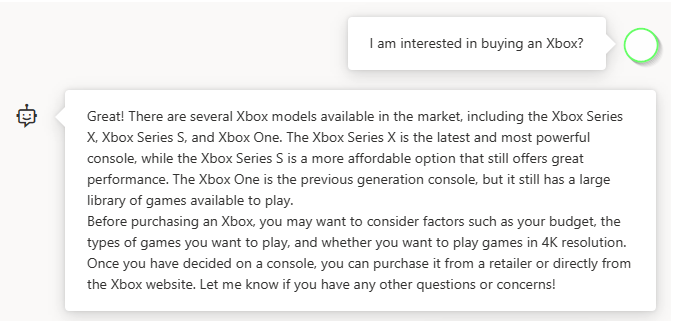
Enter a follow-up question like: "which models support 4K?"

Now that you have a basic conversation select View code from under Assistant setup and you'll have a replay of the code behind the entire conversation so far:
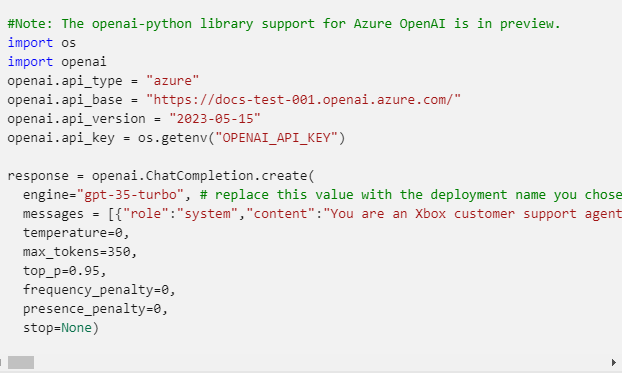
If you examine the sample from View code you'll notice some unique tokens that weren't part of a typical GPT completion call. ChatGPT was trained to use special tokens to delineate different parts of the prompt. Content is provided to the model in between <|im_start|> and <|im_end|> tokens. The prompt begins with a system message that can be used to prime the model by including context or instructions for the model. After that, the prompt contains a series of messages between the user and the assistant.
The assistant's response to the prompt will then be returned below the <|im_start|>assistant token and will end with <|im_end|> denoting that the assistant has finished its response. You can also use the Show raw syntax toggle button to display these tokens within the chat session panel.
The ChatGPT how-to guide provides an in-depth introduction into the new prompt structure and how to use the gpt-35-turbo model effectively.
Once you're satisfied with the experience in Azure OpenAI studio, you can deploy a web app directly from the Studio by selecting the Deploy to button.

The first time you deploy a web app, you should select Create a new web app. Choose a name for the app, which will become part of the app URL. For example, https://<appname>.azurewebsites.net.
Select your subscription, resource group, location, and pricing plan for the published app. To update an existing app, select Publish to an existing web app and choose the name of your previous app from the dropdown menu.
